Quick Start New Operator- Benchmark CC84
 |
This QuickStart procedure helps the operator understand the level of accuracy any existing presses match to the desired reference condition (GRACoL, ISO Coated, other). |
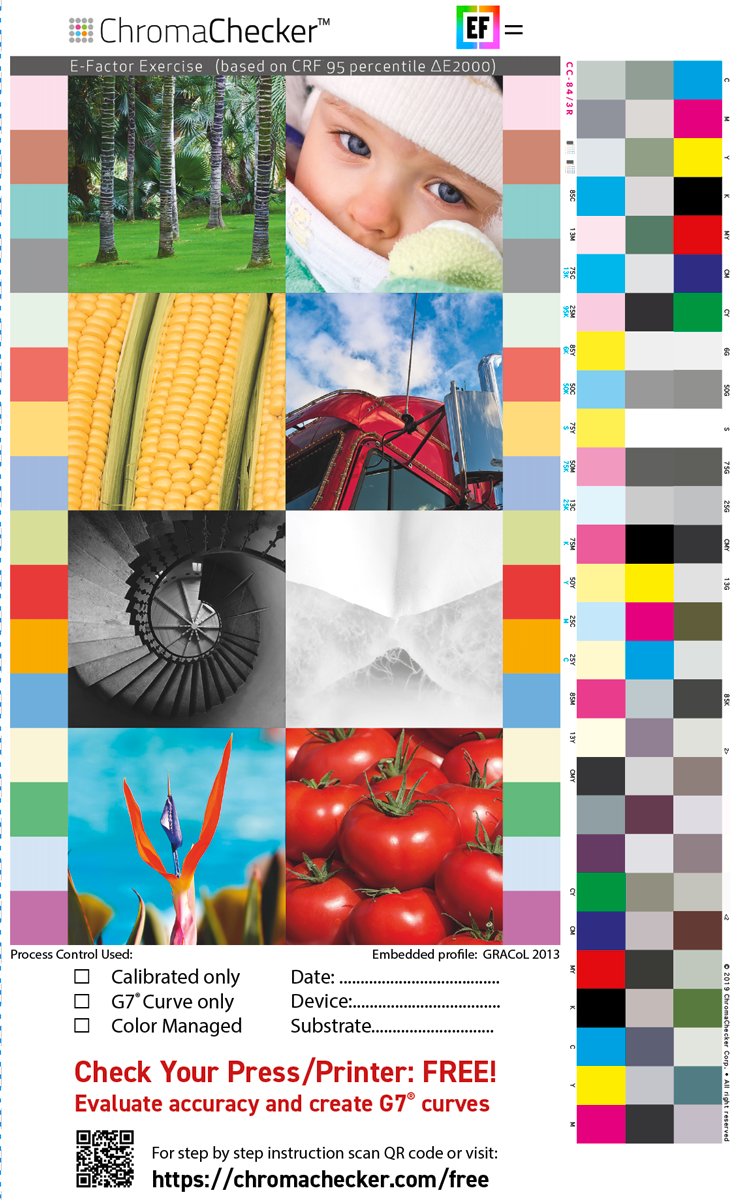
1. Download the PDF and print it on your Printer
You may print this file using various printer settings and see which setting is most accurate to GRACoL/ISO Coated. If so, don't forget to document the settings for each printout.
2. Download CC Capture, connect supported Instrument
You may select Mac or Windows version. If you find any problem please check the troubleshooting guidelines
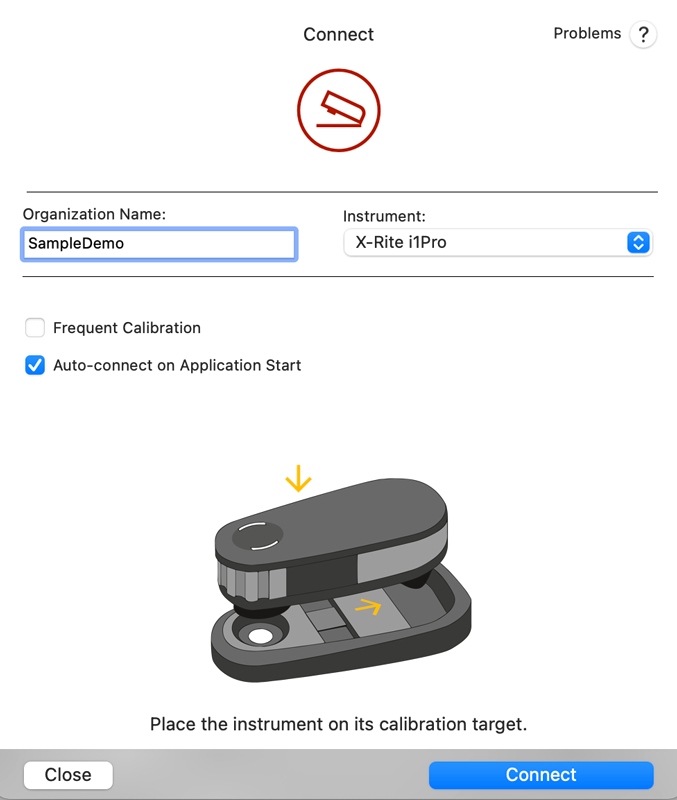
3. Launch the CC Capture application
At this stage, enter the Organization Name (shown on your "Welcome to ChromaChecker" invitation email, then select the instrument type (in the following example it is X-Rite i1Pro)
4. Watch Video showing how to use selected instrument with Capture
Please click play on attached video (login page) to learn how to operate your instrument, and follow on-screen instructions.
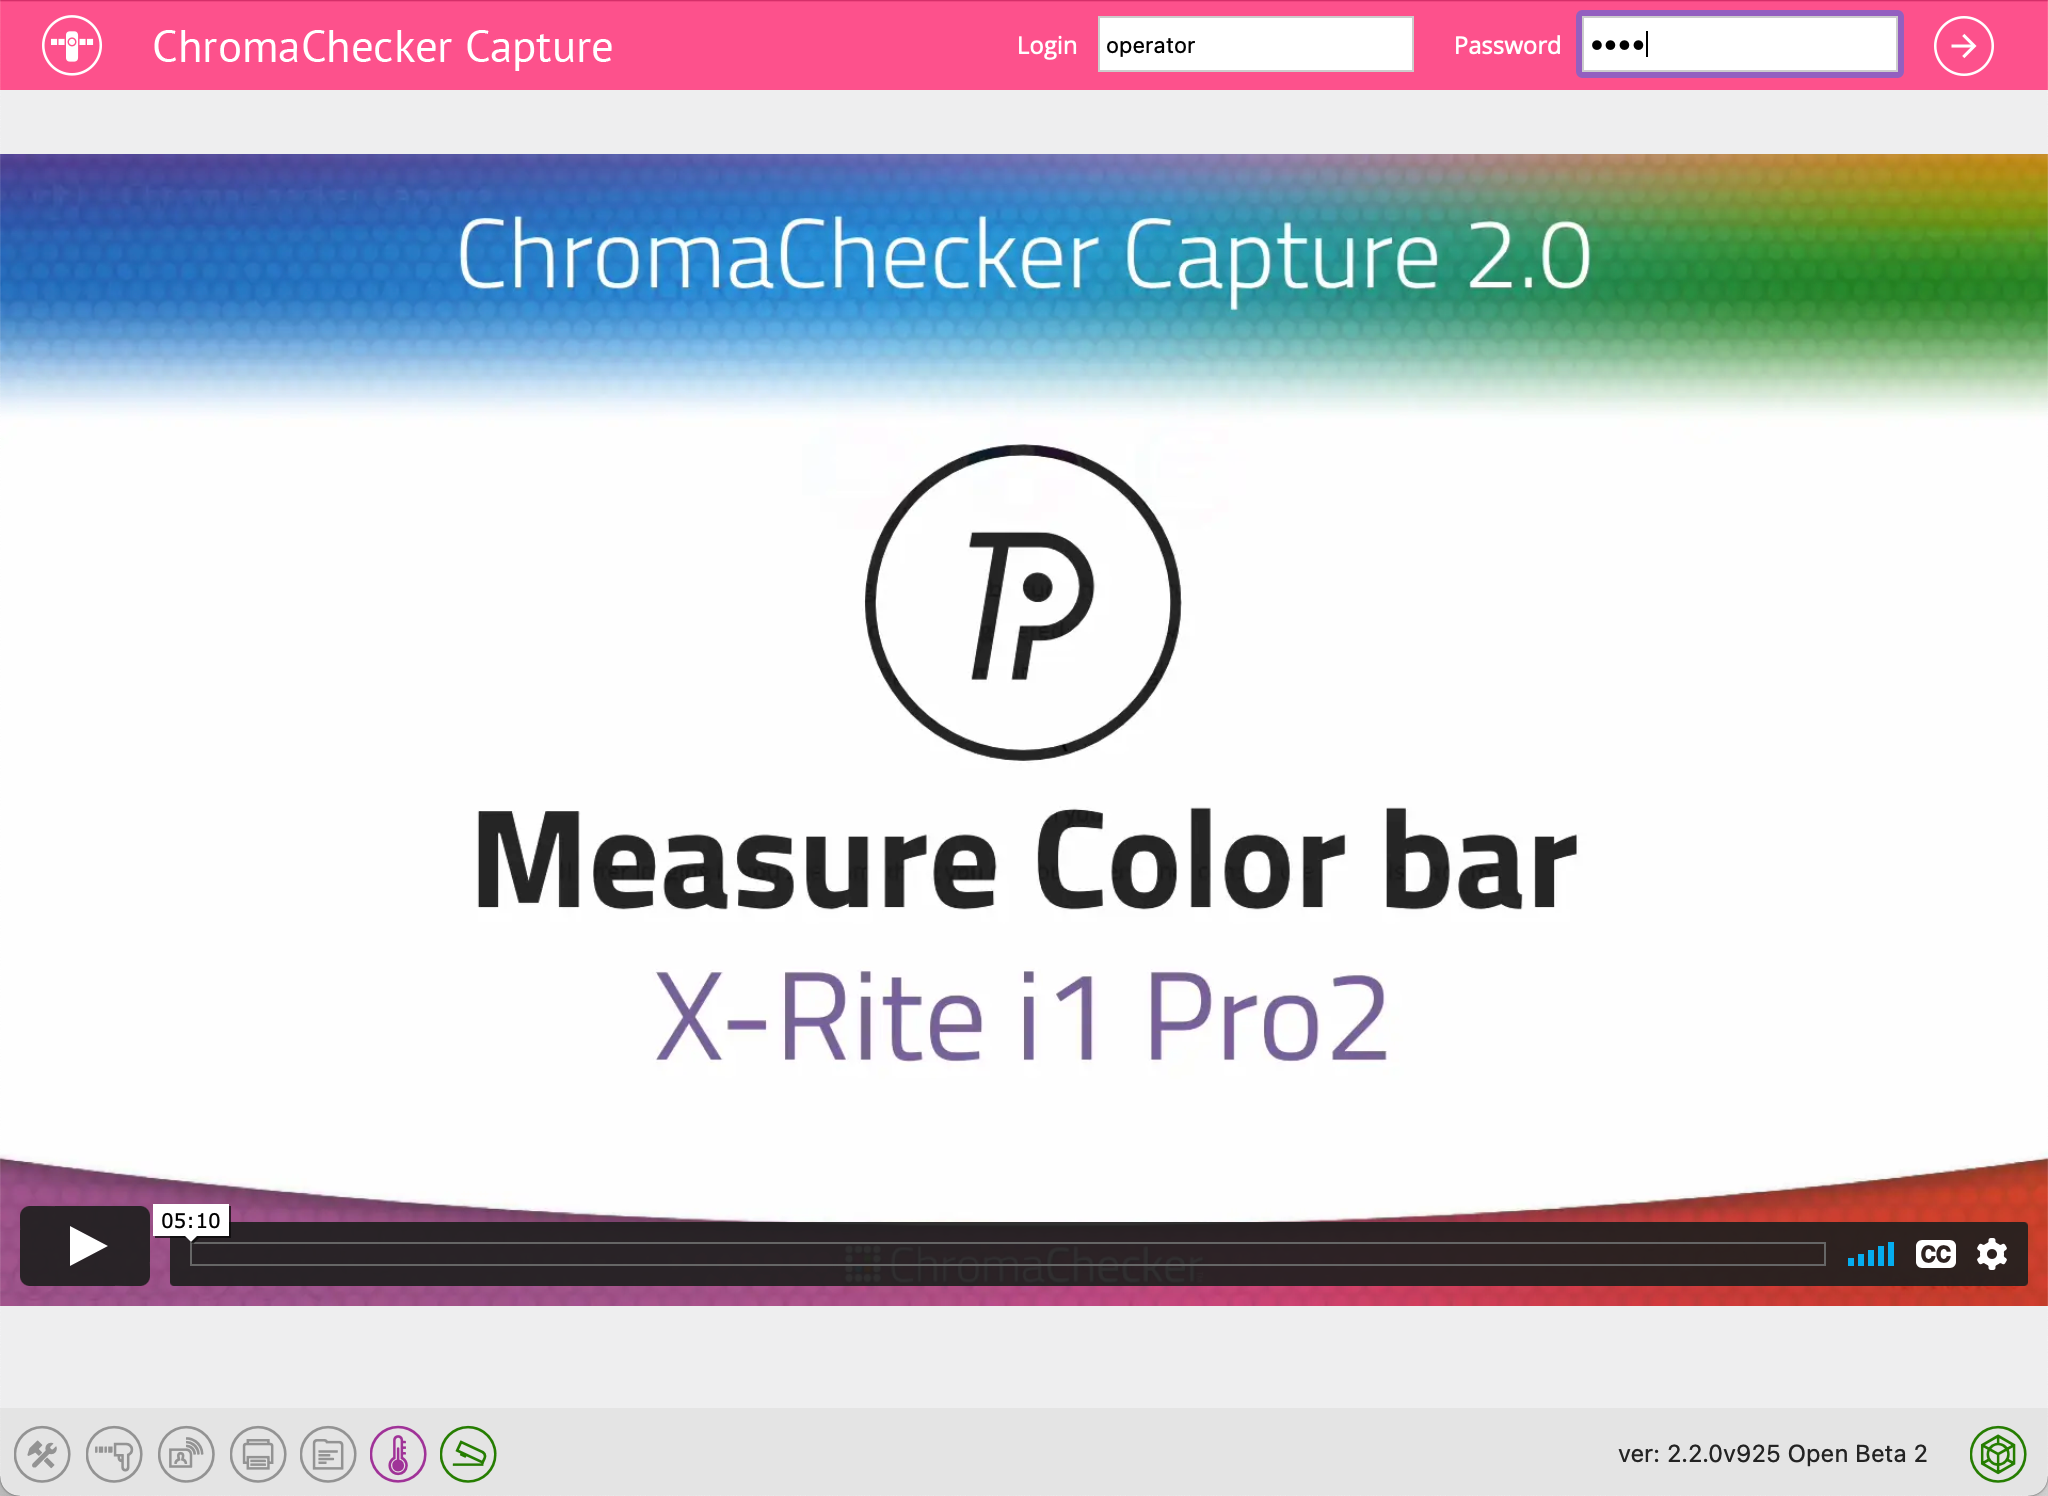
5. Login with the operator's credentials
Enter your Operator's login and password (you received your Login name in the "Welcome to ChromaChecker" which prompted you to set your password), use this information to login to Capture
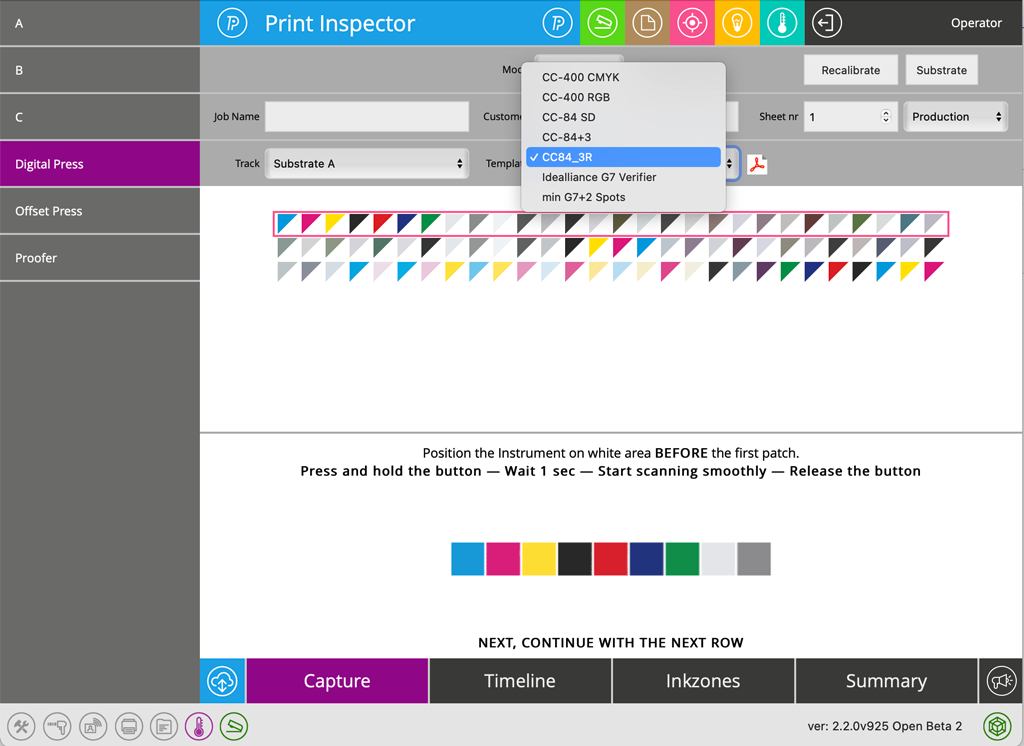
6. Prepare to measure control strip
The user has to select:
- Printer (left column) - in the above example the selected printer is labeled "Digital Press" (you may not have any printer choices on the left if you only have access to one printing device.
- Track - Keep on "Coated" setting if measuring coated paper, change to Uncoated if printing on Uncoated.
- Template - To measure above downloaded PDF benchmark set template to "CC-84_3R" control strip
By selecting a specific printer and track (substrate), the measurement data will populate into that printer allowing for tracking the consistency and accuracy of the printing device.
7. Scan Control Strip
Please watch the beginning attached video (login page) to learn how to operate your instrument, and follow on-screen instructions.
8. Interpret Report
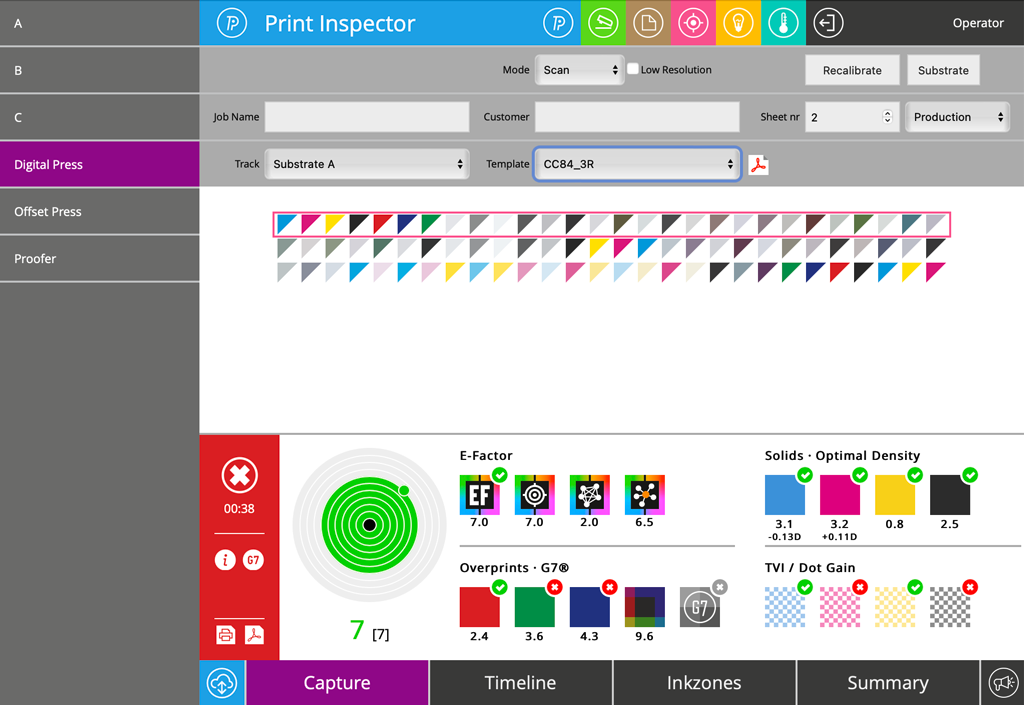
ChromaChecker will report how many E-Factor your printing device is off from the desired reference (like GRACoL or ISO Coated). You may want to use ChromaChecker tools (G7 Curve creation, and or ICC Profile generation) to reduce E-Factor to reference.
Optional Steps
These next steps are only important if you want to try and improve your printers accuracy by applying a G7 Curve correction in your workflow.
9. Create G7 Curves
By clicking the G7 icon (on the RED background- shown in report above) you can create a G7 Calibration correction curve
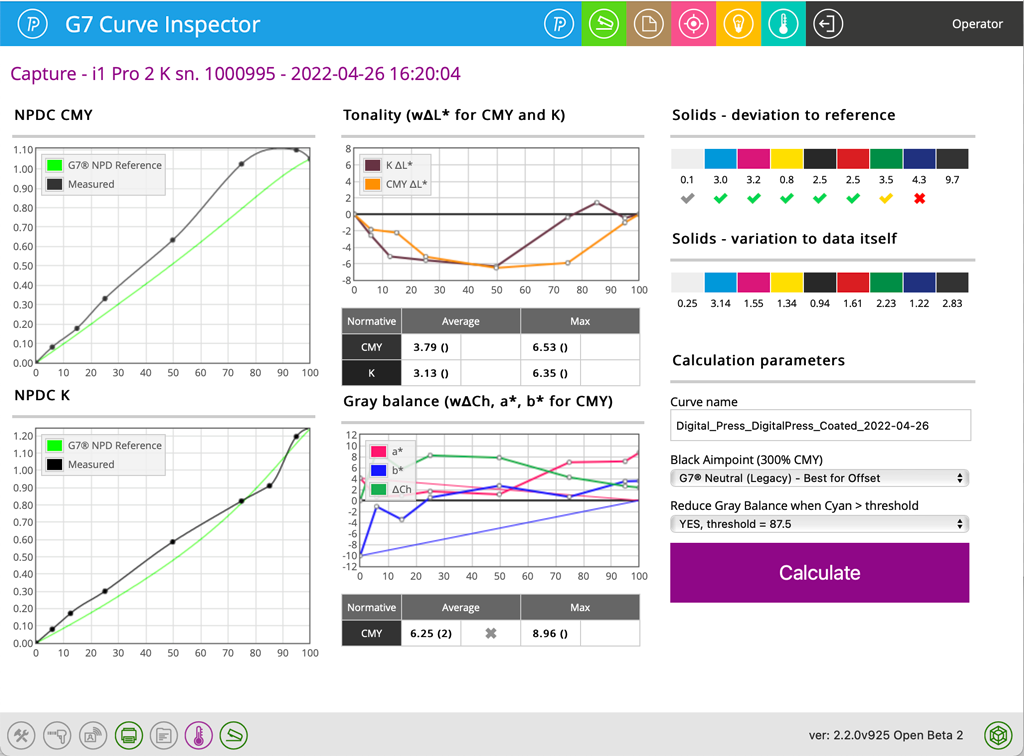
In order to get the curve file (default CGATS file, but can customize) to download, make sure you choose the download folder icon from bottom left side of screen (third icon from right) to configure where you want your curve correction file downloaded.
10. Judge data quality - qualify for Curve generation
On the above example, the Blue overprint is out of specification, and curves will not fix this, you may consider building an ICC Profile to fix the blue overprint. Additionally, we can see that the cyan solid has a fairly large delta E variation = 3.14 but conditionally we can accept it and create curves by clicking the "Calculate" button. You may need to perform maintenance to improve within sheet variation of the printer before building a curve or profile.
11. Save Calibration curves - install them in your Printing System
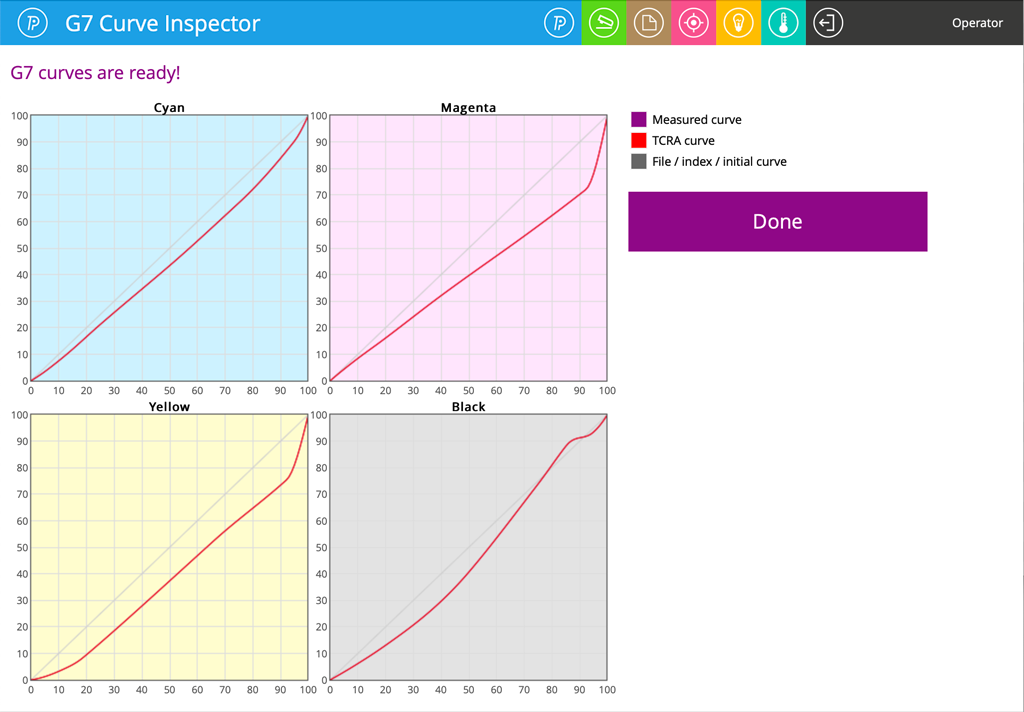
Each print track preference can define a different curve file format based on the user's workflow. This ensures that the proper curve will be delivered - the user may specify the default folder where calibration curves are saved.
Apply G7 Calibration, print PDF again, and measure CC-84. Compare before and after!
NOTES
Pocket Instruments users
If you are using NIX Spectro 2, Variable Spectro 1, or i1Pro3 Plus - print the target to be scaled up by at least 150-200%. These instruments require larger patch sizes to be measured properly.
X-Rite iSis users
Please use iSis compatible functional equivalent.
Contact ChromaChecker Support
Additional information and Support Form is available for logged users.